Introduction
How to install a shower system at home is a task many homeowners want to try on their own to save money and upgrade their bathroom. With the right tools and a clear step-by-step process, it’s possible to complete the installation without needing professional help.
In this guide, you’ll learn everything from preparing your tools to testing the final setup. Whether you’re replacing an old shower or installing a new system, this simple guide will help you do it safely and correctly.
Table of Contents
Tools and Materials You’ll Need
Before you start learning how to install a shower system at home, it’s important to gather all the necessary tools and materials. Having everything ready will save time, prevent mistakes, and make the installation process much smoother.
Essential Tools
These basic tools will help you complete the installation efficiently:
- Adjustable wrench – Used to tighten and loosen plumbing fittings
- Screwdriver set – Needed for mounting brackets and fixtures
- Drill machine – Helps create holes for wall mounting
- Pipe wrench – Useful for gripping and turning pipes securely
- Level tool – Ensures your shower components are perfectly aligned
Required Materials
Along with tools, you’ll need the following materials:
- Shower system kit – Includes the shower head, valve, handle, and sometimes a handheld unit
- Teflon tape (plumber’s tape) – Prevents leaks by sealing pipe threads
- Wall plugs and screws – Used to securely mount the shower components
- Flexible hose – Required if your system includes a handheld shower
Optional but Helpful Items
These aren’t mandatory, but they can make the job easier:
- Measuring tape – For accurate placement of fixtures
- Marker or pencil – To mark drilling points
- Bucket or towel – To catch any leftover water during installation
Having these tools and materials ready before you start will make the process of installing a shower system at home much easier, especially for beginners. It also reduces the chances of interruptions once the installation begins.
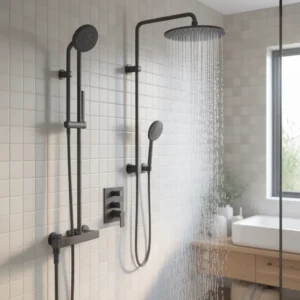
Types of Shower Systems (Quick Overview)
Before you dive into how to install a shower system at home, it’s important to understand the different types available. Each type has a slightly different installation process and is suited for different needs and bathroom setups.
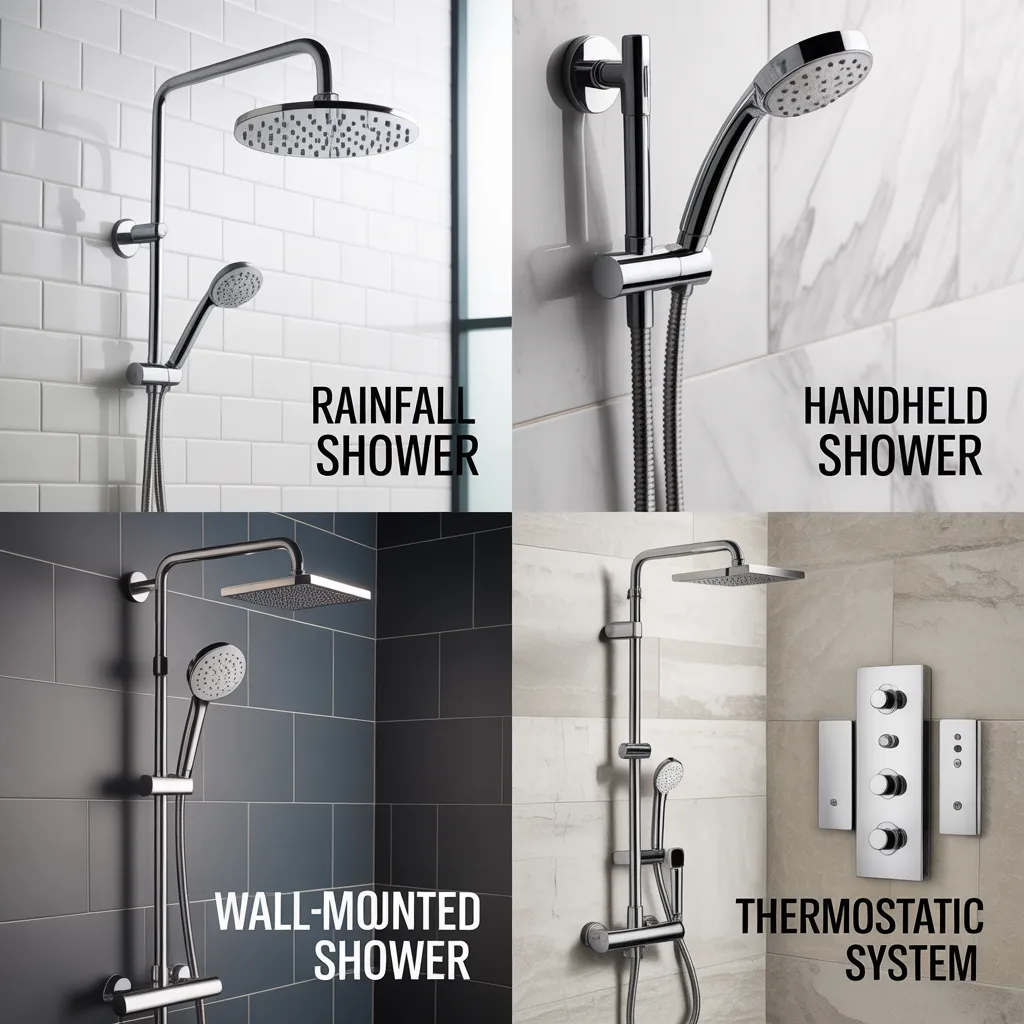
Wall-Mounted Shower Systems
This model is the most common type found in homes. The shower head is fixed to the wall and connected to a simple control valve.
- Easy to install
- Budget-friendly
- Ideal for beginners
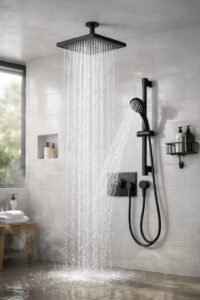
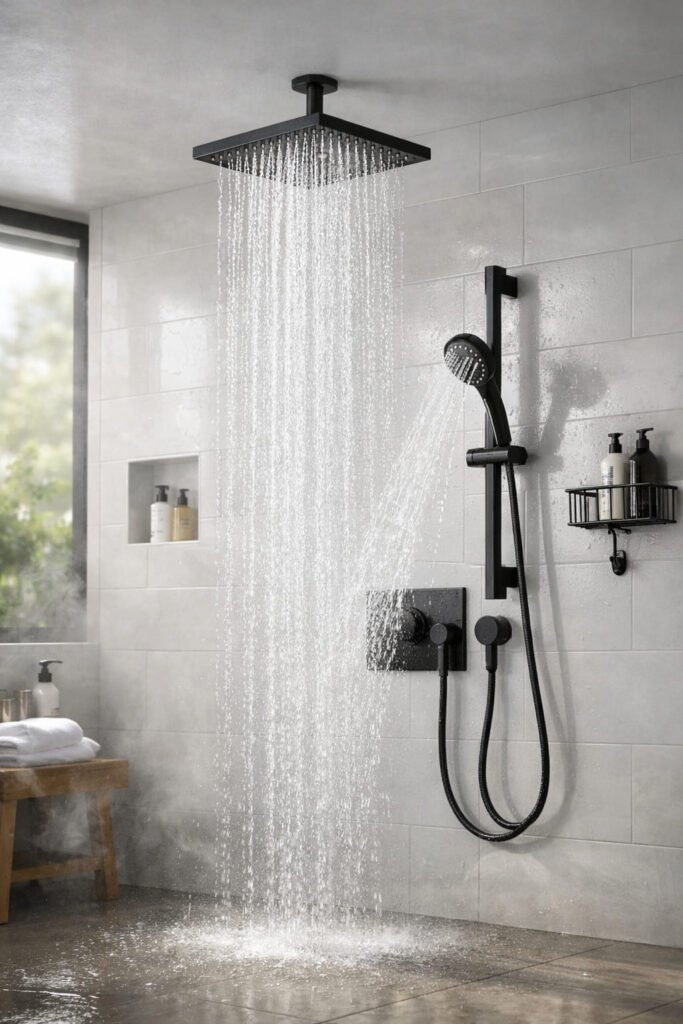
Rainfall Shower Systems
Rainfall systems are designed to give a spa-like experience. The shower head is usually larger and mounted either on the ceiling or high on the wall.
- Provides even water flow like rain
- Modern and stylish look
- May require extra installation effort
Handheld Shower Systems
These systems come with a detachable shower head connected by a flexible hose.
- Easy to use and clean
- Great for families and pets
- Can be used alongside other shower types
Thermostatic Shower Systems
Thermostatic systems allow you to control and maintain a constant water temperature.
- Prevents sudden temperature changes
- More advanced and safer
- Slightly more complex to install
Choosing the right type will make a big difference when learning how to install a shower system at home, as some systems require more effort and adjustments than others. For most beginners, a wall-mounted or handheld system is the easiest place to start.
Pre-Installation Preparation
Proper preparation is a key part of learning how to install a shower system at home. Taking a few simple steps before installation will help you avoid leaks, alignment issues, and unnecessary damage.
Turn Off Water Supply
Before starting any work, shut off the main water supply to your bathroom. This prevents water from flowing while you remove or install components. Open the shower tap afterwards to release any remaining water in the pipes.
Remove Old Shower Fixtures
Carefully remove the existing shower head, arm, and control valve if you’re replacing an old system. Use the right tools to avoid damaging the pipe threads or wall fittings.
Verify Plumbing Connections
Inspect the exposed pipes and connections for any damage, rust, or leaks. Make sure the hot and cold water lines are working properly. If you notice any major issues, it’s better to fix them before moving forward.
Measure and Mark Installation Points
Use a measuring tape and level tool to mark where the new shower components will be installed. Proper alignment is important for both functionality and appearance. Mark drilling points clearly to avoid mistakes.
Taking the time to prepare properly will make the process of how to install a shower system at home much smoother and help ensure a clean, professional-looking installation.
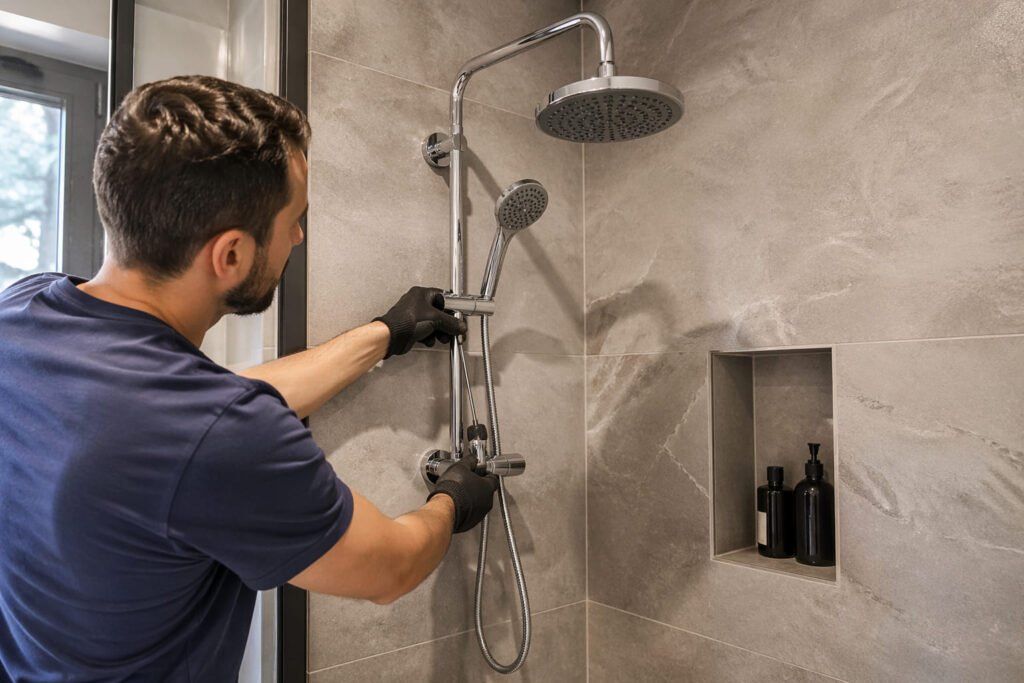
Step-by-Step Guide: How to Install a Shower System at Home
Now that everything is prepared, it’s time to follow the actual steps of how to install a shower system at home. This simple, step-by-step process is designed for beginners and will help you complete the installation safely and correctly.
Step 1 – Install the Shower Valve
Start by installing the shower valve inside the wall (or using the existing one if it’s compatible).
- Connect the hot and cold water lines to the correct inlets.
- Make sure the valve is positioned straight and securely
- Use Teflon tape on threaded connections to prevent leaks.
Step 2 – Attach the Shower Arm
The shower arm connects the water supply inside the wall to the shower head.
- Wrap Teflon tape around the pipe threads
- Screw the shower arm into the wall outlet.
- Tighten it gently using a wrench while keeping it aligned
Step 3 – Install the Shower Head
Once the arm is in place, attach the shower head.
- Screw it onto the shower arm
- Hand-tighten first, then lightly secure if needed
- Avoid over-tightening to prevent damage
Step 4 – Install Handheld Shower (If Included)
If your system includes a handheld unit, install it next.
- Mount the holder or bracket on the wall
- Connect the flexible hose to the water outlet and showerhead
- Ensure all connections are tight and leak-free
Step 5 – Install Control Panel / Mixer
Attach the control handle or mixer panel to the valve.
- Align it properly with the valve
- Secure it with screws provided in the kit.
- Make sure it moves smoothly for temperature and pressure control
Step 6 – Turn On Water and Test
Finally, turn the water supply back on and test the system.
- Check all connections for leaks
- Run both hot and cold water.
- Ensure proper water pressure and temperature control
Following these steps will help you successfully complete how to install a shower system at home without needing professional help. Take your time with each step to ensure a safe and long-lasting installation.
Common Mistakes to Avoid
When learning how to install a shower system at home, avoiding a few common mistakes can save you from leaks, damage, and extra repair costs. Here are the most common mistakes new learners tend to make, along with simple ways to prevent them.
Over-Tightening Connections
It might seem like tightening fittings as much as possible will prevent leaks, but the opposite can happen. Over-tightening can damage threads, crack fittings, or cause misalignment.
Tip: Tighten firmly but gently—just enough to secure the connection.
Skipping Teflon Tape
Not using Teflon tape (plumber’s tape) is one of the main causes of leaks. It helps seal threaded connections and ensures a watertight fit.
Tip: Wrap the tape 2–3 times around the threads before connecting parts.
Incorrect Valve Installation
Installing the shower valve incorrectly can lead to reversed hot and cold water or poor water flow.
Tip: Always follow the manufacturer’s markings and instructions when connecting water lines.
Poor Alignment of Fixtures
If components like the shower head, handle, or brackets are not aligned properly, it can affect both appearance and performance.
Tip: Use a level tool and measure carefully before drilling or fixing anything.
Not Checking for Leaks
Some people skip proper testing after installation, which can lead to hidden leaks and long-term damage.
Tip: Turn on the water and inspect every connection carefully before finishing.
Avoiding these mistakes will make the process of how to install a shower system at home much smoother and help ensure a safe, professional-quality result.
Safety Tips During Installation
When working on how to install a shower system at home, safety should always come first. Even a simple installation involves tools, water connections, and sometimes drilling, so taking precautions is important.
Turn Off the Water Supply
Always shut off the main water supply before starting. This prevents unexpected water flow and reduces the risk of flooding or damage.
Use the Right Tools
Using improper or low-quality tools can lead to injuries or damage to fixtures.
Tip: Always use the correct size wrench, screwdriver, and drill for each task.
Be Careful When Drilling
Drilling into bathroom tiles or walls requires extra care.
- Mark the exact spot before drilling
- Drill slowly to avoid cracking the tiles
- Check for hidden pipes or wires behind the wall
Avoid Slippery Surfaces
Bathrooms can become slippery during installation.
Tip: Keep the floor dry and wear shoes with a good grip to prevent slipping.
Handle Fixtures Carefully
Shower components can be delicate, especially chrome or glass parts.
Tip: Handle them gently to avoid scratches, cracks, or breakage.
Test Slowly After Installation
Slowly restore the water supply when you turn it back on. This helps you spot leaks or issues without causing sudden pressure damage.
Following these safety tips will make the process of how to install a shower system at home safer and more manageable, especially if you’re doing it for the first time.
How Long Does It Take to Install a Shower System?
If you’re planning how to install a shower system at home, one of the most common questions is how much time it will take. The good news is that most installations can be completed fairly quickly, especially with proper preparation.
Average Time Required
For a standard installation, it usually takes 1 to 3 hours. This applies to simple setups like wall-mounted or handheld shower systems where existing plumbing is already in place.
Factors That Affect Installation Time
- Type of Shower System
Basic systems are faster to install, while advanced options like thermostatic or rainfall systems may take longer. - Existing Plumbing Condition
If your pipes and connections are in good shape, the process will be quicker. Repairs or adjustments can add extra time. - Experience Level
Beginners may take longer as they work carefully through each step, while experienced DIYers can complete the job faster. - Wall Drilling and Mounting
Installing brackets or drilling tiles can take additional time, especially if precision is required.
When It May Take Longer
The installation can take more than a few hours if:
- You need to replace or install a new shower valve.
- Wall modifications or tile cutting is required
- There are plumbing issues that need fixing.
Overall, understanding the time involved in how to install a shower system at home helps you plan better and complete the job without rushing. Taking your time is always better than making mistakes that could lead to costly repairs later.
When Should You Call a Professional?
While many people can manage how to install a shower system at home on their own, there are situations where calling a professional plumber is the safer and smarter choice. Knowing when to get expert help can prevent damage and ensure everything works properly.
Complex Plumbing Work
If your installation requires major changes to existing plumbing lines, it’s best to call a professional. This includes moving pipes, installing new water lines, or replacing old valves inside the wall.
Wall or Tile Modification Needed
If the job involves cutting tiles, opening walls, or adjusting pipe positions behind the wall, professional help is recommended. These tasks require experience and special tools to avoid costly mistakes.
Low or Unstable Water Pressure
If your bathroom already has weak or inconsistent water pressure, installing a new shower system may not solve the issue. A plumber can identify and fix the root cause before installation.
Leaks You Can’t Fix
If you notice continuous leaks after installation or are unsure where the problem is coming from, a professional can quickly diagnose and repair it.
Lack of Proper Tools or Confidence
If you don’t have the right tools or feel unsure about any step of how to install a shower system at home, it’s better to avoid risk and hire an expert.
Calling a professional at the right time can save you from unnecessary repairs, water damage, and frustration, ensuring your shower system is installed safely and correctly.
Maintenance Tips After Installation
Once you’ve successfully learned how to install a shower system at home, proper maintenance is important to keep it working smoothly and extend its lifespan. Regular care also helps prevent leaks, blockages, and performance issues.
Clean the Shower Head Regularly.
Over time, mineral deposits and dirt can clog the shower head.
Tip: Remove and clean it with warm water and vinegar every few weeks to maintain strong water flow.
Check for Leaks Periodically
Even a properly installed system can develop small leaks over time.
Tip: Inspect all joints, valves, and connections regularly to catch issues early.
Wipe Fixtures to Prevent Build-Up
Soap scum and water stains can affect both appearance and function.
Tip: Wipe metal and glass parts with a soft cloth after use to keep them clean and shiny.
Maintain Proper Water Pressure
If you notice a drop in pressure, it may be due to clogging or pipe issues.
Tip: Clean filters and check for blockages in the shower hose or head.
Tighten Loose Parts
With regular use, some fittings may loosen slightly.
Tip: Gently tighten screws or connections if needed, but avoid over-tightening.
By following these simple maintenance steps after learning how to install a shower system at home, you can ensure your shower stays efficient, durable, and comfortable for years to come.
FAQs
Can I install a shower system at home by myself?
Yes, you can install a shower system at home if you have basic DIY skills and the right tools. Simple wall-mounted or handheld systems are usually beginner-friendly.
Do I need plumbing experience to install a shower system?
Not necessarily. Basic installations don’t require professional plumbing experience. However, understanding pipe connections and following instructions carefully is important.
How much does it cost to install a shower system at home?
The cost depends on the type of shower system and tools needed. A basic DIY installation is usually affordable, especially if no major plumbing changes are required.
What is the easiest shower system to install?
Wall-mounted and handheld shower systems are the easiest to install. They require fewer adjustments and are ideal for beginners learning how to install a shower system at home.
How do I know if my installation is successful?
After installation, turn on the water and check for leaks, proper water pressure, and correct hot and cold water flow. If everything works smoothly, your installation is successful.
Conclusion
Learning how to install a shower system at home is a practical skill that can save money and improve your bathroom without needing professional help for every situation. With the right tools, proper preparation, and careful step-by-step execution, most standard shower systems can be installed safely and effectively.
The key is to take your time, follow each step correctly, and avoid common mistakes like over-tightening fittings or skipping sealing tape. Once installed, regular maintenance will ensure your shower system continues to perform well for years.
Whether you are upgrading your bathroom or replacing an old unit, this guide gives you a clear and simple path to complete the job with confidence.